Publish open government data end to end: the Woo & DCAT overlay
Tie the OpenRegister → OpenConnector → OpenCatalogi pipeline into one compliant Woo open-data chain. The three deep tutorials teach each app on a Pet Store; this capstone overlays the Dutch open-government layer on top — the canonical Woo and DCAT registers, an external open-data source mapped to a Dataset, the publicatiedatum publish rule, and a DCAT-AP-NL feed that data.overheid.nl harvests. Grab data from a source, and publish it on a catalog.
The first three parts of this series set up the registers, the files, and a public catalog for Dutch open-government data. Conduction also has a three-tutorial pipeline that teaches the same three apps from the ground up, end to end, on the canonical Pet Store sample:
- Model and manage your data with OpenRegister — registers, schemas, relations, objects, search, versioning, permissions.
- Pull external data into your register with OpenConnector — a source, a mapping, and a scheduled synchronisation.
- Publish a public catalog with OpenCatalogi — scope a catalog, publish with a date rule, expose a DCAT-AP-NL feed.
This capstone is the Woo & DCAT overlay on that pipeline. Rather than repeat the mechanics, it points you at each deep tutorial and then layers the open-government specifics on top: the canonical registers you import instead of hand-building, the open-data source you map to a Dataset, and the DCAT-AP-NL feed that national portals harvest. The shape is identical to the Pet Store chain — grab data from a source, and publish it on a catalog — only the domain changes.
Each deep tutorial below stands alone and uses the Pet Store. This page is the bridge: read a deep tutorial for the how, then apply the Woo overlay here for the open-data what. If you have already followed Parts 1, 2 and 3, this ties them into one chain.
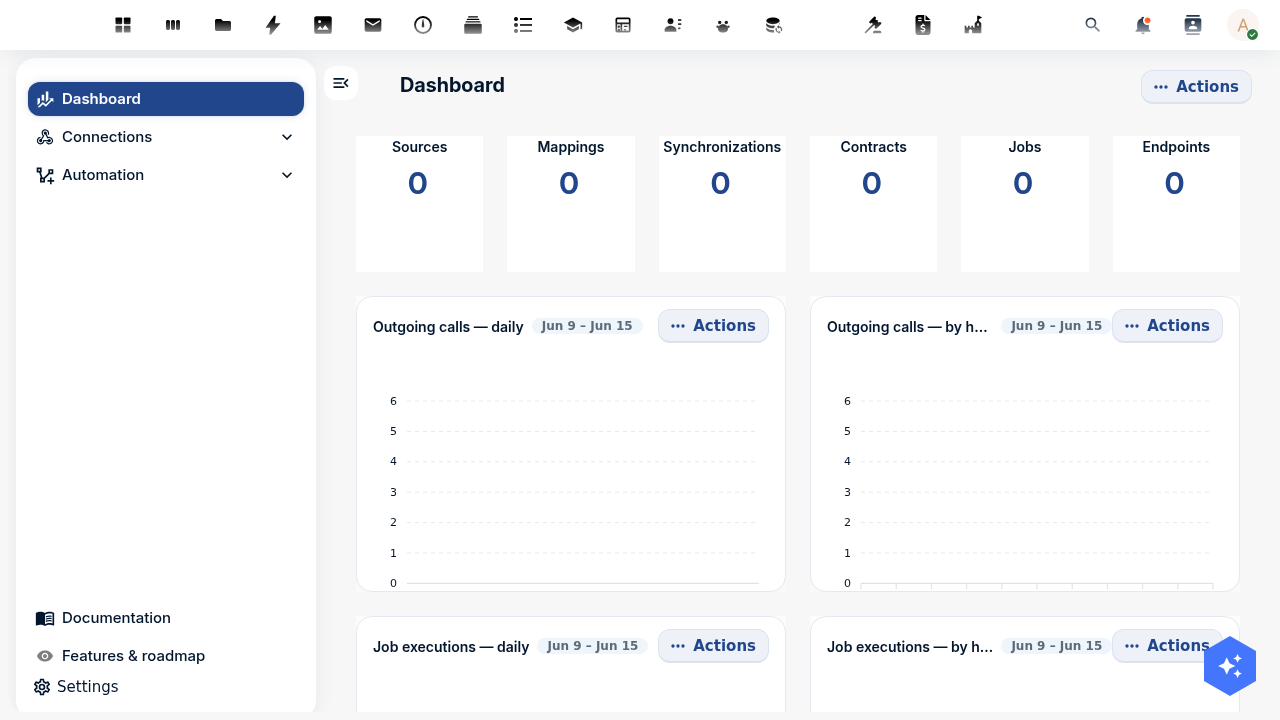
The chain at a glance
The whole pipeline is three apps in a row. Each generic tutorial teaches one stage on the Pet Store; the Woo overlay swaps the pet domain for the open-data one. Nothing about the mechanics changes.
| Stage | What runs | Learn the mechanics | The Woo / DCAT overlay |
|---|---|---|---|
| 1. Model | OpenRegister | Model your data with OpenRegister | Import the canonical Woo and DCAT registers instead of hand-building a pet schema. |
| 2. Pull | OpenConnector | Pull data with OpenConnector | Point the source at an open-data API and map records onto the Dataset schema, publishing on arrival. |
| 3. Publish | OpenCatalogi | Publish a catalog with OpenCatalogi | Scope the catalog to the DCAT register and expose a DCAT-AP-NL feed for national harvesters. |
Overlay 1: the register — import the canonical Woo & DCAT models
The deep OpenRegister tutorial builds a register and its schemas by hand. For Woo you do not hand-build anything: the Woo register (with its ten TOOI information categories) and a DCAT register (for open-data Dataset objects) are published as OpenRegister configuration files and imported from a URL, exactly as the deep tutorial's final step (export & import configuration) describes.
This is Part 1 of the Woo series: open OpenRegister → Administration → Configurations → Import Configuration → Import from URL and point it at the canonical configuration. OpenRegister recreates the register, its schemas and their TOOI categories in one transaction.
Apply the overlay: after Part 1 you have a DCAT register with a Dataset schema, the target for everything below.
Overlay 2: the source — map an open-data API onto a Dataset
The deep OpenConnector tutorial pulls pets from the Swagger Pet Store into a pet schema. The Woo overlay changes only two things: the source is an open-data API, and the mapping targets the Dataset schema with one extra field that publishes the record the moment it arrives.
OpenConnector splits every integration into three objects, built in order — exactly as the deep tutorial details:
- Source: where the data comes from (a base URL and how to authenticate).
- Mapping: how a record is reshaped (each
Datasetfield is a Twig expression over the source record). - Synchronisation: what runs (it pulls an endpoint, applies the mapping, and writes into the DCAT register on a schedule).
Register the open-data API as a source
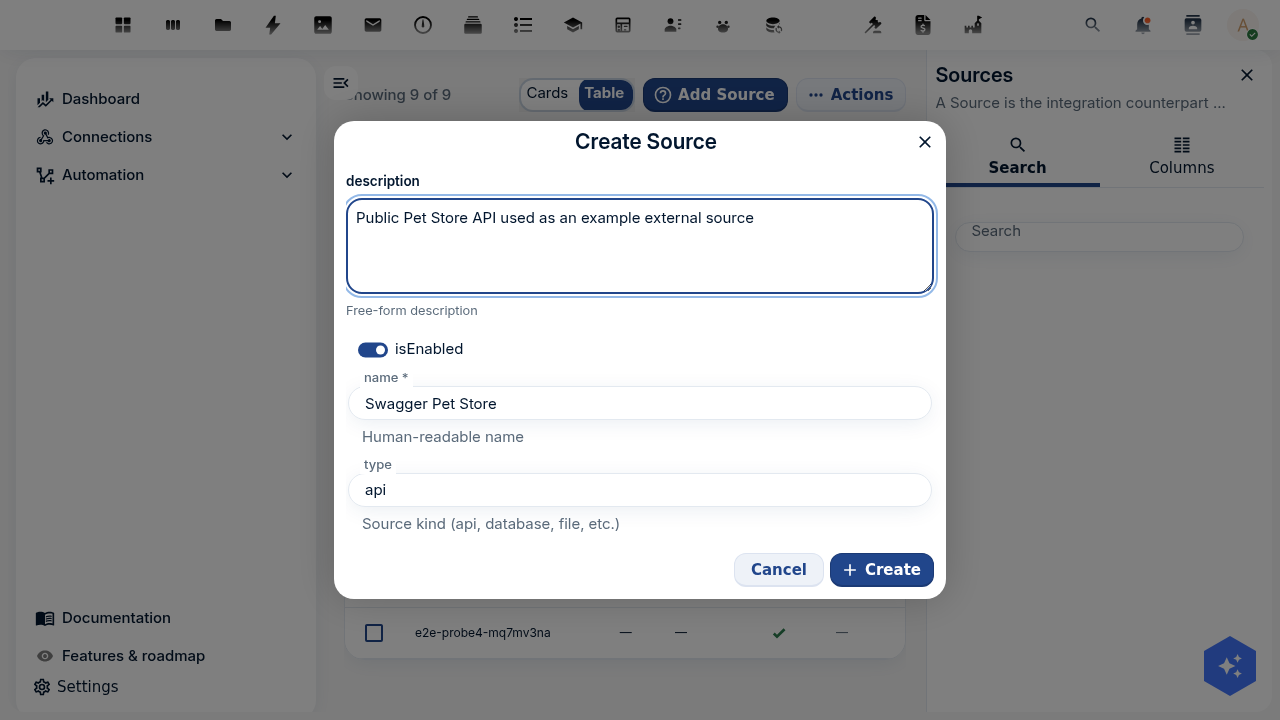
Follow Step 1 of the deep tutorial — OpenConnector → Sources → Add Source, set the type to api and the location to your open-data API's base URL — then test the connection. For a secured government API you set the authentication on the source; OpenConnector stores the credentials encrypted.
Map records onto the Dataset schema
The only Woo-specific step. Where the Pet Store mapping produced { name, species, status }, the Woo mapping produces a Dataset, and it sets publicatiedatum to now so the dataset is public the instant it lands — that is the field the catalog keys visibility on (Overlay 3).
Dataset field | Twig expression |
|---|---|
title | {{ name }} |
description | {{ description }} |
category | {{ category.name }} |
status | Published |
publicatiedatum | {{ "now"|date("Y-m-d H:i:s") }} |
Use the mapping's Test mapping action against a sample record before wiring it up, just as the deep tutorial shows, so you can see the reshaped Dataset before it writes anything.
Tie it together and run
Create the synchronisation (source + endpoint + results position + id position + mapping + the DCAT register and Dataset schema as the target), then Run it. The run reports how many records it found, created, updated and skipped; on a re-run the id position deduplicates so the register tracks the source without duplicates.

- UI
- API
- PHP
Do the click-path in the deep OpenConnector tutorial: create the source, write the mapping with the Dataset fields above, create the synchronisation pointing at your DCAT register and Dataset schema, and run it. The only differences from the pet chain are the source URL, the five mapping rows above, and the target schema.
The API calls are identical to the deep tutorial's; only the mapping body and the target change. Replace <DCAT_REGISTER>/<DATASET_SCHEMA> with your ids:
# Mapping: reshape an open-data record into a Dataset, publishing on arrival
curl -u admin:admin -X POST "http://localhost:8080/index.php/apps/openconnector/api/mappings" \
  -H "OCS-APIRequest: true" -H "Content-Type: application/json" \
  -d '{ "name": "Source to dataset", "passThrough": false, "mapping": {
        "title": "{{ name }}", "description": "{{ description }}",
        "category": "{{ category.name }}", "status": "Published",
        "publicatiedatum": "{{ \"now\"|date(\"Y-m-d H:i:s\") }}" } }'

# Synchronisation: source → mapping → DCAT register/schema
curl -u admin:admin -X POST "http://localhost:8080/index.php/apps/openconnector/api/synchronizations" \
  -H "OCS-APIRequest: true" -H "Content-Type: application/json" \
  -d '{ "name": "Open data to datasets", "sourceId": "<SOURCE_UUID>", "sourceType": "api",
        "sourceTargetMapping": "<MAPPING_UUID>",
        "sourceConfig": { "endpoint": "<ENDPOINT>", "resultsPosition": "_root", "idPosition": "id" },
        "targetType": "register/schema", "targetId": "<DCAT_REGISTER>/<DATASET_SCHEMA>" }'
use OCA\OpenRegister\Service\ObjectService;
use OCA\OpenConnector\Service\SynchronizationService;

$objects = \OCP\Server::get(ObjectService::class);

$mapping = $objects->saveObject(
    object: [
        'name'        => 'Source to dataset',
        'passThrough' => false,
        'mapping'     => [
            'title'           => '{{ name }}',
            'description'     => '{{ description }}',
            'category'        => '{{ category.name }}',
            'status'          => 'Published',
            'publicatiedatum' => '{{ "now"|date("Y-m-d H:i:s") }}',
        ],
    ],
    register: 'openconnector', schema: 'mapping',
);
// Build the synchronisation against the DCAT register/schema and run it via SynchronizationService,
// exactly as the deep OpenConnector tutorial shows.
Apply the overlay: open the DCAT register in OpenRegister and the imported Dataset objects are there, already carrying a publicatiedatum of now.
Overlay 3: publish — scope the catalog and expose a DCAT-AP-NL feed
The deep OpenCatalogi tutorial explains the publish model in full: a catalog is a filter (a registers + schemas scope), and visibility is an OpenRegister RBAC rule that grants the public group read only when publicatiedatum is at or before now. There is no "publish" button. The Woo overlay is simply that the catalog scopes to your DCAT register and the public reads it as DCAT-AP-NL.
Follow Part 3 of the Woo series to scope the publications catalog to the DCAT register and Dataset schema. Then read it as an anonymous visitor — the future-dated and undated datasets stay hidden, exactly as the deep tutorial proves from a logged-out browser:
https://your-host/index.php/apps/opencatalogi/api/publications
The DCAT-AP-NL feed
This is the genuinely open-government payoff. DCAT-AP-NL is the Dutch profile of the W3C DCAT vocabulary, and it is what data.overheid.nl and data.europa.eu harvest. OpenCatalogi renders your published datasets as DCAT-AP-NL — each Dataset as a dcat:Dataset, each attached file (from Part 2) as a dcat:Distribution — from the same objects, with no extra storage and no new schema. Open the feed anonymously:
https://your-host/index.php/apps/opencatalogi/api/dcat
You get a JSON-LD document carrying the data.overheid.nl/dcat-ap-nl/3.0 profile. Each published dataset becomes a dcat:Dataset and each file a dcat:Distribution:
{
  "@context": {
    "dcat": "http://www.w3.org/ns/dcat#",
    "dct": "http://purl.org/dc/terms/",
    "profile": "https://data.overheid.nl/dcat-ap-nl/3.0"
  },
  "@graph": [
    {
      "@id": "https://your-host/index.php/apps/opencatalogi/api/dcat",
      "@type": "dcat:Catalog",
      "dct:title": "OpenCatalogi",
      "dcat:dataset": [{ "@id": "https://your-host/.../objects/427/1428/5bbd2b06" }]
    },
    {
      "@id": "https://your-host/.../objects/427/1428/5bbd2b06",
      "@type": "dcat:Dataset",
      "dct:title": "Energielabels per adres 2026",
      "dct:description": "Voorlopige energielabels gekoppeld aan BAG-adressen.",
      "dcat:keyword": ["energie", "bag", "wonen"],
      "dcat:theme": { "@id": "http://publications.europa.eu/resource/authority/data-theme/ECON" },
      "dct:license": "CC0-1.0",
      "dct:modified": "2026-03-01",
      "dct:identifier": "5bbd2b06-565f-4d65-9dfe-3b79398acf15",
      "dcat:landingPage": { "@id": "https://your-host/.../objects/427/1428/5bbd2b06" },
      "dcat:distribution": [
        {
          "@type": "dcat:Distribution",
          "dct:title": "energielabels-2026.csv",
          "dcat:downloadURL": { "@id": "https://your-host/.../files/energielabels-2026.csv" },
          "dcat:mediaType": "text/csv",
          "dct:format": { "@id": "http://publications.europa.eu/resource/authority/file-type/CSV" }
        }
      ]
    }
  ]
}
To publish a single catalog as its own harvestable feed, enable DCAT on the catalog and read its per-catalog endpoint at /api/catalogs/publications/dcat. The per-catalog feed lists your published datasets as dcat:Dataset nodes and honours the same publicatiedatum visibility rule.
The per-catalog /dcat endpoint and the dataset nodes are gated behind a DCAT-harvesting flag on the catalog; the deep OpenCatalogi tutorial covers this in detail. The public /api/publications API needs no flag and is the endpoint to verify against first.
Apply the overlay: a national portal points at your /api/dcat (or per-catalog) feed on a schedule and lists your published datasets alongside everyone else's open data. The chain is complete: an external source feeds the register, and the register feeds the open-data web.
Test yourself
The synchronisation runs but creates zero datasets. Where do you look first?
The results position. If it does not point at the list of records in the source response, OpenConnector finds nothing to process. Open the source endpoint in a browser and check where the array sits — a bare top-level array is _root. The deep OpenConnector tutorial has the full troubleshooting list.
Datasets import but never show in public search. What did the mapping miss?
publicatiedatum. The catalog's publish rule only shows the public group a dataset whose date is now or earlier. Set publicatiedatum to now in the mapping (Overlay 2) so records are public on arrival, or set it by hand after a review step.
What does a national portal like data.overheid.nl read — the search API or the DCAT feed?
The DCAT feed. /api/dcat and the per-catalog /dcat endpoint render your datasets as DCAT-AP-NL, the format harvesters expect. The /api/publications search API is for people and applications.
Why import the Woo and DCAT registers instead of building schemas by hand?
DCAT-AP-NL is a standard. Importing the canonical configuration gives your Dataset schema the exact fields a harvester expects and keeps it aligned as the standard evolves. The import mechanism is the same export/import the OpenRegister tutorial teaches.
Where to go from here
You have the whole chain: an external API feeds your register, a catalog publishes it, and a DCAT-AP-NL feed makes it harvestable — new records flowing in on a schedule and out to the open-data web. From here, deepen any link in the chain, or rebuild it for your own domain.