Build personalised dashboards with LaunchPad

LaunchPad turns the single, fixed Nextcloud dashboard into a set of personal, drag-and-drop workspaces. Every user gets their own dashboards; every dashboard is an independent canvas with its own layout, its own widgets, and its own URL. Admins keep control — roll out templates, restrict widgets per group, and pin a group-wide default — while users still get the freedom to personalise.
This tutorial walks the whole surface end to end, from a first-run dashboard to an admin rollout, using nothing but the UI.
Step 1 — Open LaunchPad for the first time
Click the LaunchPad icon in the Nextcloud app launcher, or visit
/apps/launchpad/ directly. The very first time you open it, LaunchPad creates a
personal dashboard for you and seeds it with a starter bundle so you never face
an empty grid.
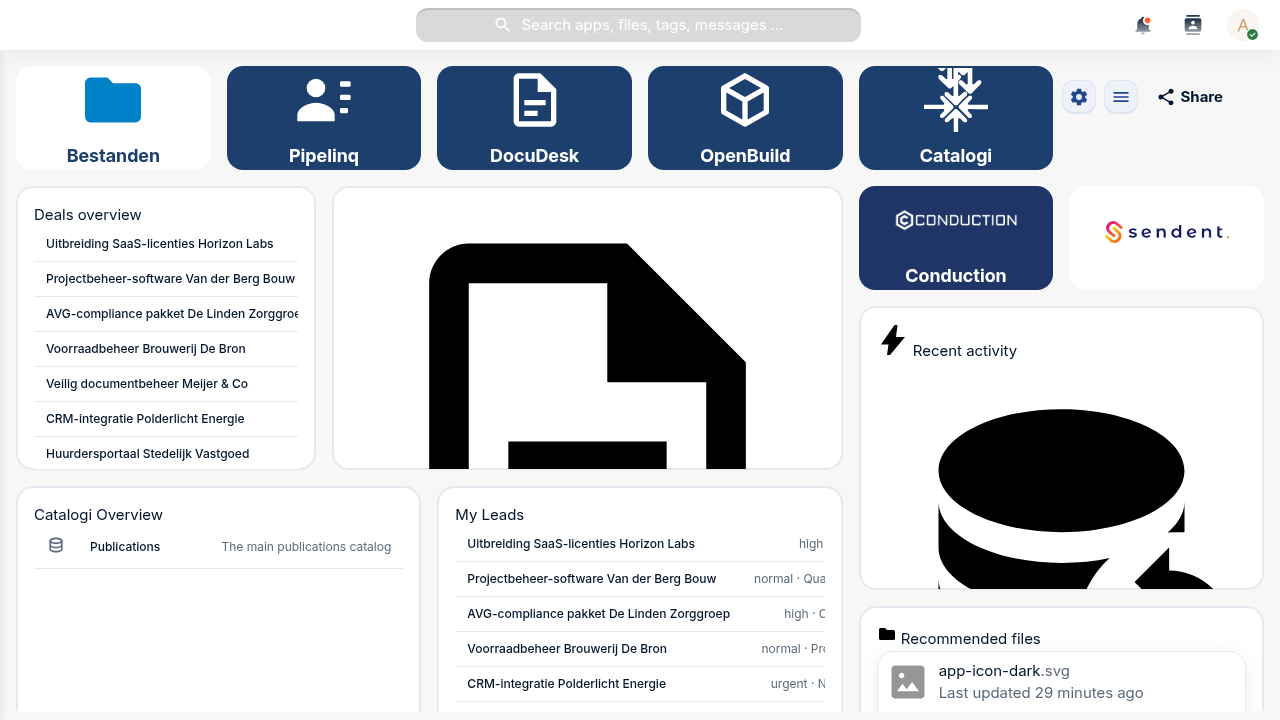
Two things share the grid, and it's worth knowing the difference from the start:
- Tiles are shortcut cards — an icon, a colour, a label, and a link to an app or URL. They are LaunchPad's own lightweight launcher.
- Widgets are content blocks. LaunchPad renders both its own custom widgets (Label, Text, Image, Link-button, Files, People, News, Calendar, …) and any native Nextcloud dashboard widget (Activity, Recommended files, Calendar, Talk, your other apps' widgets) on the same grid.
Step 2 — Enter edit mode and add a widget
Open the active dashboard's cog menu (top-right of the workspace) and click Edit dashboard. Resize handles appear on every placement, and each tile and widget grows a small menu button in its corner.
To add a LaunchPad custom widget, open the cog menu again and choose Add custom widget…. The Add Widget modal opens:
- Pick a Widget type (for example Link Button).
- Fill in the type-specific fields — a label, a URL, an action type, colours.
- Optionally open the Appearance section to set a custom title, a background, and an icon.
- Click Add. The widget lands on the grid and is saved immediately.
For a native Nextcloud widget, the same picker family lets you choose the Nextcloud widget you want (Activity, Recommended files, a widget from any other installed app) — it's proxied onto the grid exactly as in Step 1.
Troubleshooting
The widget type list only shows a few options. Custom widget types that haven't shipped a configuration form yet are filtered out of the picker — only types you can actually configure appear. Native Nextcloud widgets come from whatever apps are installed and expose a dashboard widget.
Step 3 — Add a shortcut tile
Still in edit mode, add a tile for a link you use constantly. Open a tile's menu → Edit tile (or add a new one) and you get:
- A Title.
- An Icon — a searchable Material Design Icons catalogue (7,000+ icons) on
the Icons tab, plus a Custom tab. When the
nldesignapp is enabled, the Custom tab also offers the NL Design government icon set; when it isn't, that pack is simply hidden rather than showing broken images. - Background and Text colours.
- A URL — an app path like
/apps/filesor any external link.
Tiles are the fast way to turn a dashboard into a launcher for your team's most -used tools.
Step 4 — Reposition, resize, and fine-tune
The grid is a responsive 12-column layout. In edit mode:
- Drag a widget by its header to move it; neighbours reflow around the drop point and the layout saves as soon as you release.
- Resize from the corner/edge handles.
- Edit any placement's content and appearance from its Edit widget entry (content fields and the Appearance section — show-title, custom title, background, icon — live in one modal).
- Delete widget removes a placement immediately (there's no undo, so toggle Show title off instead if you only want to de-emphasise it).
Step 5 — Create a second dashboard
One dashboard per context — a project, a workflow, a role. In the sidebar, click + Add dashboard.
Each dashboard has a stable, friendly URL (/apps/launchpad/<slug>) you can
bookmark or share with a colleague who has access.
Step 6 — Pin a default
When you open /apps/launchpad/ cold, LaunchPad has to pick a dashboard to land
you on. Your personal pin always wins. Open the cog menu on the dashboard you
want and click Set as default — a ★ marker appears next to it in the
sidebar, and that's where LaunchPad opens from now on.
Step 7 — Share a dashboard
Use the Share button (or the cog menu's Share) to open the sharing surface. Today it shares a dashboard with specific users and groups, each with a permission level — View only, Add only, or Full customization.
Troubleshooting
Where's the public link? LaunchPad has a public-share API (a tokenised, brute-force-protected read-only link at /apps/launchpad/s/{token}), but the point-and-click control to create one from the UI is still on the roadmap. For now the Share button covers logged-in user/group sharing; public links are minted via the API.
Step 8 — Switch hats: roll out a template (admin)
Everything so far was per-user. Now the admin side. Open Settings → Administration → LaunchPad.
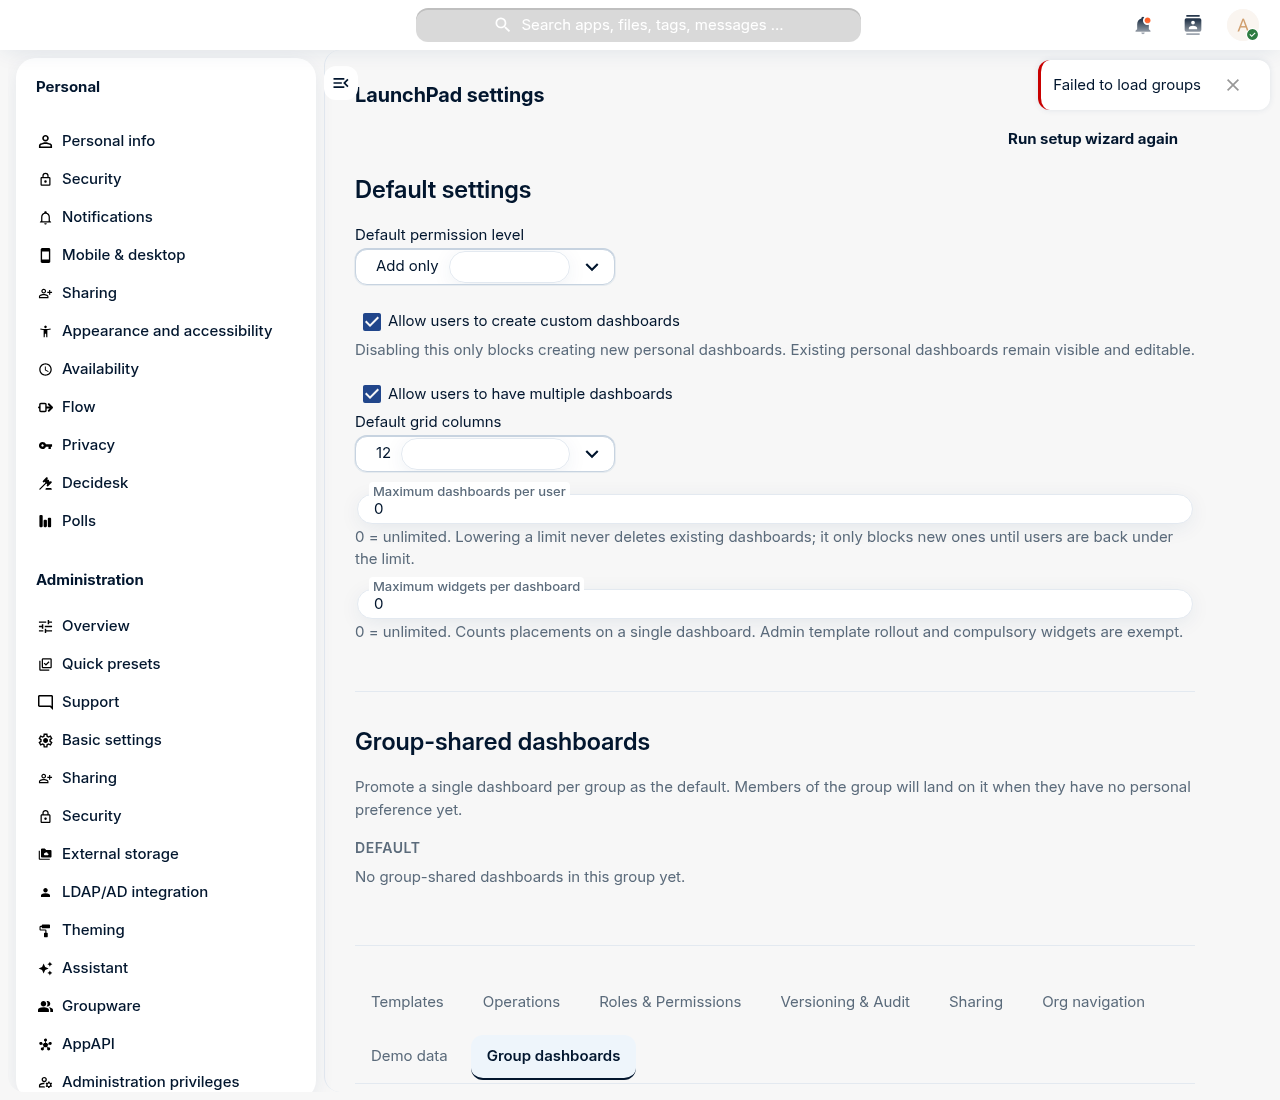
The top of the page holds the global defaults — whether users may create personal dashboards, how many they may have, the default permission level, grid columns, and per-dashboard widget limits.
On the Templates tab, click Create template to author a dashboard centrally and assign it to one or more Nextcloud groups. The first time a member of an assigned group opens LaunchPad, they get their own editable copy of the template — a consistent starting layout without locking anyone in. Mark widgets as compulsory in the template and users can't remove them.
Step 9 — Restrict widgets per group (admin)
On the Roles & Permissions tab you define, per Nextcloud group, an allow-list of widget types. Members of a restricted group see a filtered picker — handy for keeping niche or sensitive widgets out of specific teams, or for reducing choice for non-technical users. An empty list means the full catalogue (the default).
The other tabs round out the admin surface: Group dashboards (one shared dashboard per group, plus the org-wide default set), Sharing (org-wide share defaults and forced-share groups), Operations (health + Prometheus metrics), Versioning & Audit (conditional-visibility rules and privacy-preserving view analytics), and Org navigation (an organisation-wide navigation tree).
Step 10 — Make LaunchPad the landing app
Finally, land every user on LaunchPad after login. This one lives in Nextcloud
core, not LaunchPad's own settings: Settings → Administration → Theming →
Navigation bar settings, enable Use custom default app, and put
LaunchPad first in the priority list. Optionally disable the stock
Dashboard app so the two don't compete. LaunchPad registers under the app id
launchpad, which is the value Nextcloud uses everywhere it refers to the app.
Troubleshooting
The menu tile opens the wrong app. LaunchPad is registered under the folder-derived id launchpad. If a custom navigation entry points at an old mydash.* route it won't resolve — use launchpad.page.index.
What you built
You took the fixed Nextcloud dashboard and turned it into a personalised, multi-dashboard workspace: native and custom widgets side by side, shortcut tiles, a second context, a pinned default, and shared access — then, as an admin, rolled a template out to a group, fenced off widgets per group, and made LaunchPad the front door for everyone.